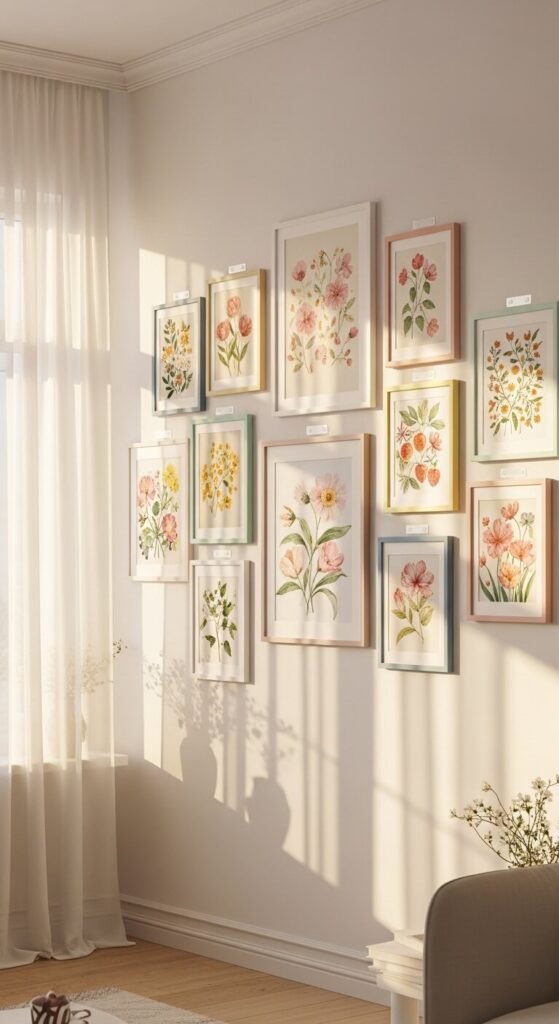
Spring is the season of fresh starts — and what better way to celebrate than transforming a blank wall into a blooming, beautiful gallery display? The best part? You don’t need a single nail, drill, or landlord’s permission to do it.
Whether you’re renting, redecorating, or just commitment-shy when it comes to holes, this guide will walk you through creating a stunning spring gallery wall that looks intentional, elevated, and totally Pinterest-worthy.
Gather Your Supplies First
Before you start arranging anything on the wall, collect everything you’ll need. Running back and forth to the hardware store mid-project is a creativity killer.
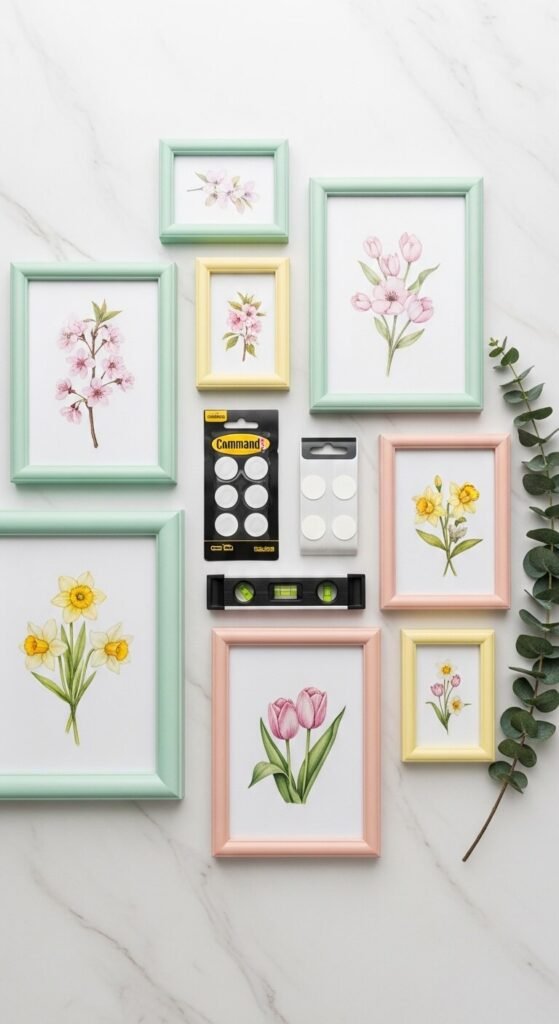
Here’s your no-holes starter kit:
Command strips or adhesive picture-hanging strips (rated for your frame weight)
Washi tape or painter’s tape (for planning your layout on the wall)
A level or leveling app on your phone
Frames, clipboards, or hanging baskets
Spring-themed prints — think florals, botanicals, pastel abstracts, or vintage seed packets
Twinkle lights or ribbon for added whimsy
Pro tip: Mix frame sizes and shapes for a more dynamic, curated look rather than a cookie-cutter grid.
Choose Your Spring Theme and Color Palette
A cohesive gallery wall needs a throughline — and for spring, you have so many beautiful directions to take it.
Popular spring palettes include:
Soft blush, sage, and cream — timeless and romantic
Sunny yellow, coral, and white — energetic and cheerful
Lavender, mint, and dusty rose — dreamy and cottagecore-inspired
Stick to two or three dominant colors and let your prints do the storytelling. You can mix photography, watercolor illustrations, typography, and pressed flower art — as long as the palette stays consistent, it will feel intentional.
Plan Your Layout on the Floor First
This is the step most people skip — and then regret. Before anything touches the wall, lay all your frames out on the floor and experiment with arrangements until something clicks.
A few layout styles to consider:
Salon wall — an eclectic, floor-to-ceiling cluster of mixed frames (maximalist and bold)
Grid layout — evenly spaced frames in matching sizes (clean and modern)
Organic scatter — frames placed at varying heights with breathing room between them (relaxed and airy)
Once you love the arrangement, use painter’s tape to outline each frame’s position directly on the wall. This gives you a life-size preview without any commitment.
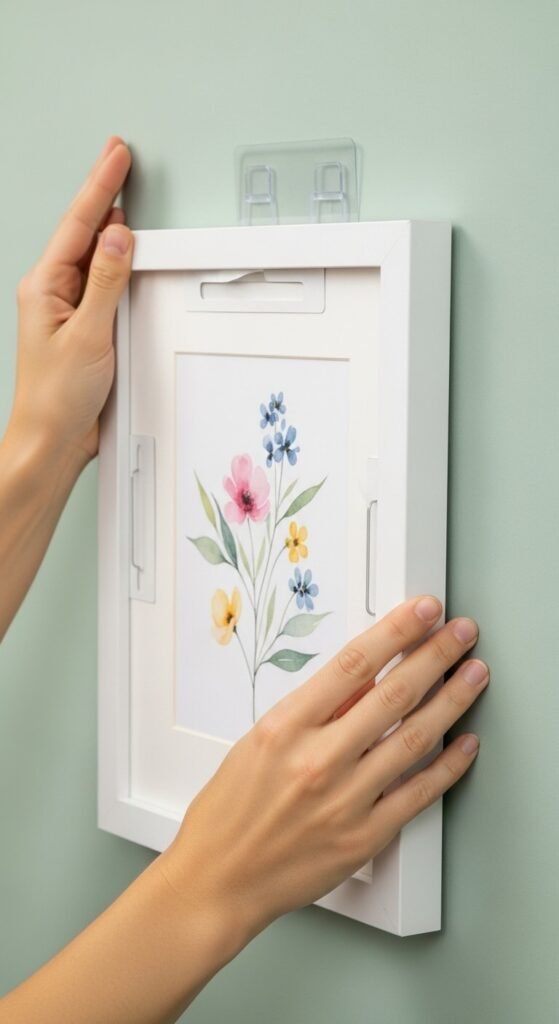
Hang Everything with Damage-Free Adhesives
Now comes the satisfying part. Command picture-hanging strips are the gold standard for hole-free hanging — they hold surprisingly well and remove cleanly when you’re ready for a change.
How to get it right:
Clean the wall surface with a dry cloth before applying any strips
Press the strips firmly against both the wall and frame for at least 30 seconds
Wait the recommended time (usually 1 hour) before hanging anything heavy
Use a leveling app to make sure each frame sits straight
For lighter items like clipboards, washi tape alone can work beautifully — and it adds a fun, handmade feel to your display.
Add the Finishing Touches
The difference between a good gallery wall and a great one is in the layering. Once your frames are up, step back and look for opportunities to add depth and texture.
Try adding:
A small shelf (also available in Command strip versions) to hold a mini vase of tulips or a tiny succulent
Dried pampas grass or eucalyptus bundles tucked behind a frame
Fairy lights draped loosely across the arrangement for evening ambiance

Your Wall, Your Rules
Creating a spring gallery wall without making holes isn’t just a renter’s hack — it’s actually smarter decorating. You can change it up with the seasons, rearrange without regret, and experiment freely.
The only rule? Make it feel like you.