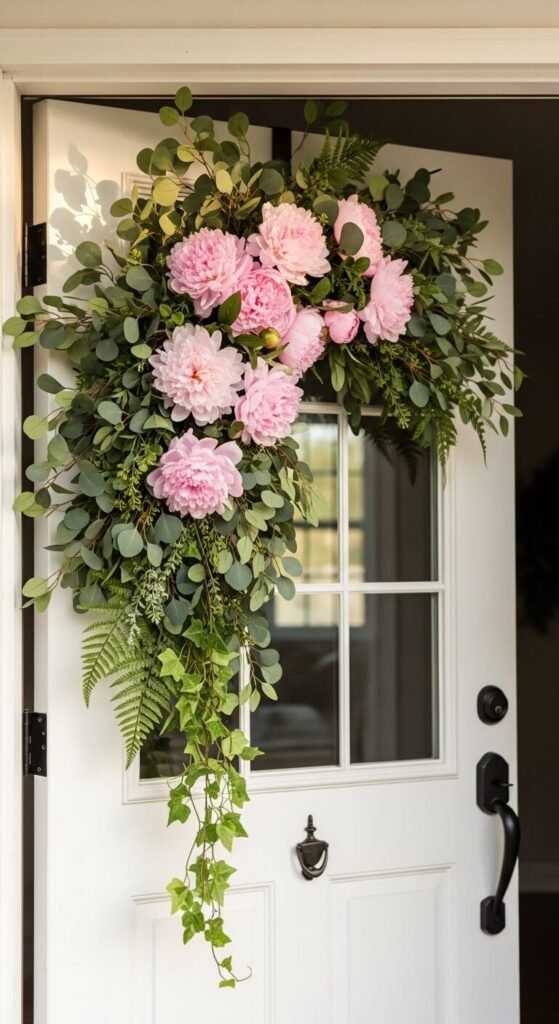
Spring is knocking — and your front door should answer in style. A handmade spring swag is one of the easiest, most satisfying DIY projects you can tackle in an afternoon. It’s fresher than a wreath, more relaxed than a formal arrangement, and instantly transforms any space from winter-bleak to bloom-chic. Whether you’re draping it over your mantel or hanging it on your front door, this is the project that will have your neighbors stopping to stare.
What Is a Spring Swag (and Why You Need One)?
A swag is essentially an asymmetrical floral arrangement — think of it as a bouquet that’s meant to be hung rather than placed in a vase. Unlike a wreath, it has a natural, cascading shape that feels effortlessly elegant. Swags work beautifully on:
Front doors (hung from a nail or ribbon)
Mantels (laid flat or slightly draped over the edge)
Staircases (attached to a banister)
Mirrors or windows (hung for a gallery-wall effect)
Best of all? You don’t need a florist’s training to make one. You just need the right materials and a little creativity.
What You’ll Need
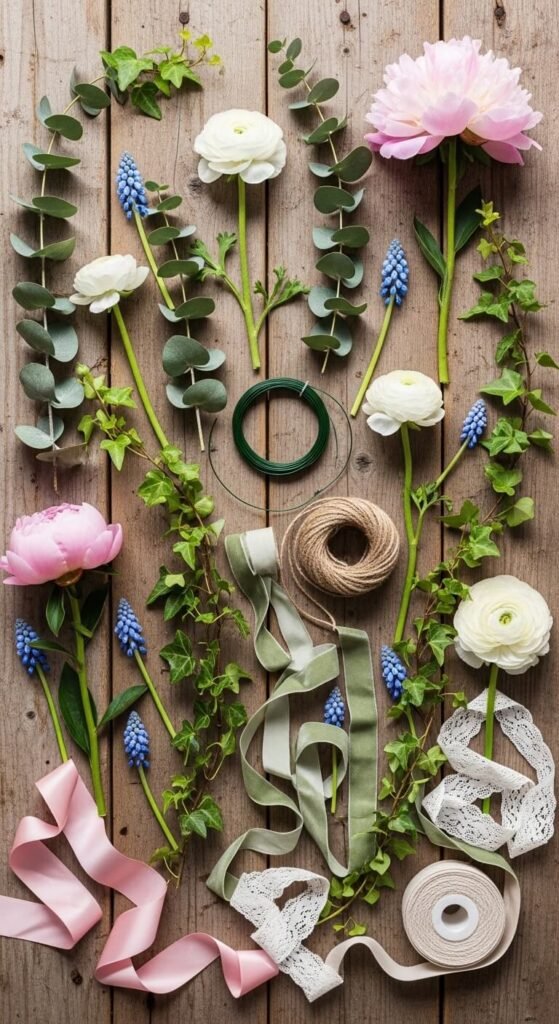
Gather your supplies before you start — this makes the whole process faster and way more fun.
Foliage & Florals:
2–3 stems of eucalyptus or seeded eucalyptus
3–5 stems of your favorite spring flowers (tulips, peonies, ranunculus, or daffodils all work beautifully)
1–2 trailing vines (ivy, jasmine, or lamb’s ear add gorgeous texture)
Filler greenery (ferns, dusty miller, or boxwood)
Tools & Extras:
Floral wire or paddle wire
Garden shears or sharp scissors
Ribbon in a complementary color (optional but lovely)
A hot glue gun (optional, for securing loose elements)
Step-by-Step: How to Build Your Spring Swag
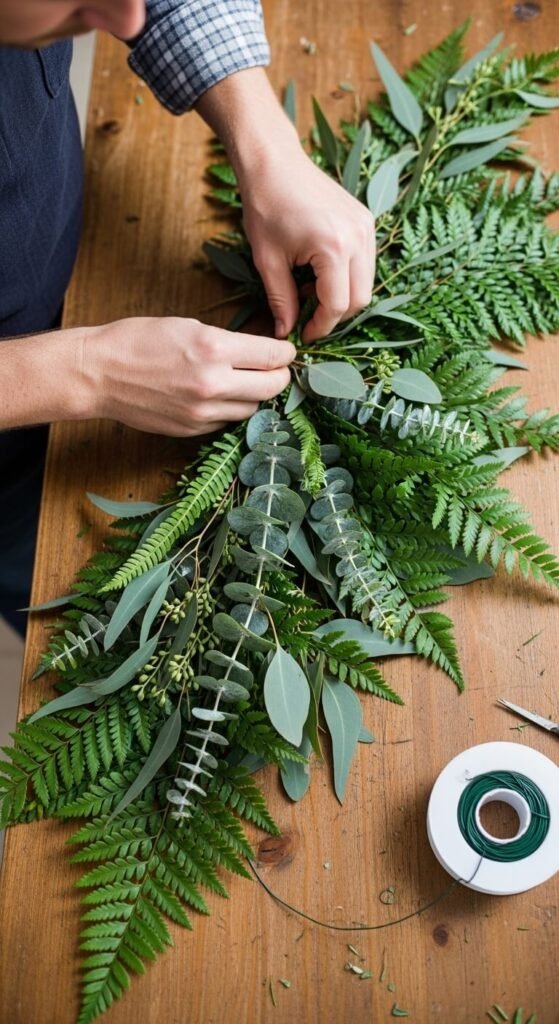
Step 1: Create Your Base
Start with your largest, leafiest stems — eucalyptus is perfect for this. Layer 2–3 stems together, slightly offset so they fan out naturally. This is your backbone. Hold them tightly at the top (your future hanging point) and wrap with floral wire to secure.
Step 2: Layer in Your Greenery
Add your filler greens next. Tuck ferns, lamb’s ear, or boxwood in and around the base stems. You want a full, lush look before you even add a single flower. Think of it like building a frame before you hang the art.
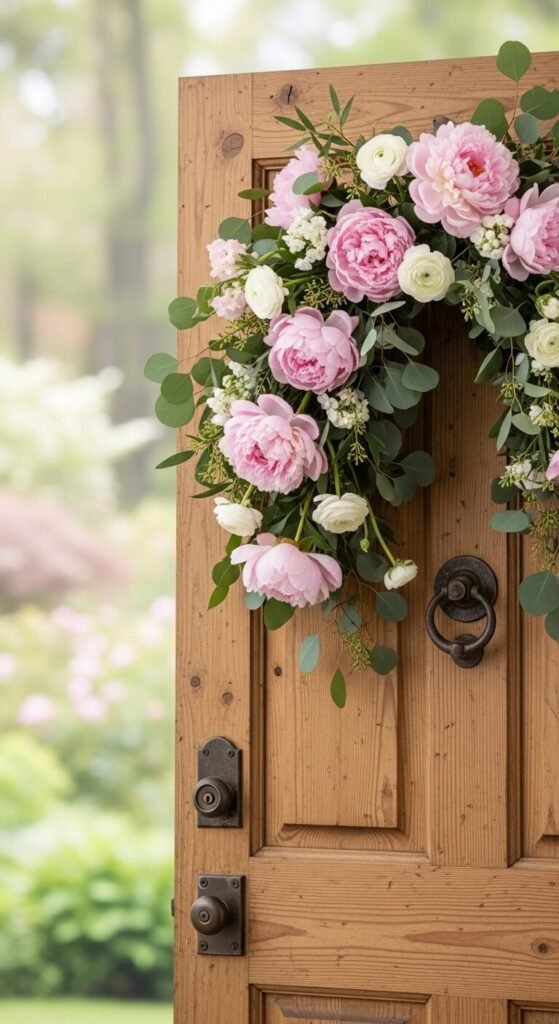
Step 3: Add Your Star Florals
Now for the fun part. Place your flowers along the length of the swag, spacing them out so they feel intentional but not stiff. A good rule of thumb:
Largest blooms near the top-center for visual weight
Medium flowers scattered through the middle
Smaller buds or clusters trailing toward the bottom tip
Wrap each stem to the base with floral wire as you go. Don’t stress about perfection — organic and a little imperfect is the whole vibe.
Step 4: Tuck in Trailing Elements
This is what makes a swag truly special. Add a trailing vine, a long wispy sprig of seeded eucalyptus, or even a length of ribbon to cascade downward from the tip. That flowing movement is the swag’s signature look.
Step 5: Finish and Hang
Wrap the top of your swag neatly with ribbon or floral tape to cover the wire. Create a hanging loop at the back. For a mantel, simply lay it flat and let it drape naturally over the edge.
Tips for Making It Last
Mist it daily if using fresh florals — this can add several days to its life
Choose hardier blooms like tulips or carnations for outdoor displays
Faux florals are completely valid — they look stunning and last all season long
Keep it out of direct sun and wind for maximum longevity
Go Ahead — Make Your Door the Most Beautiful One on the Block
Step back and take it all in. A spring swag you made with your own hands, hanging on your door or draped across your mantel, is the kind of detail that makes a house feel like a home.
Pin this guide, save it for your next seasonal refresh, and tag your finished swag — the whole community wants to see what you create. Happy crafting